


Losing a tooth is an exciting milestone for children. Parents often look for ways to add more magic to the moment. One creative idea is using a free printable Tooth Fairy receipt. But many wonder: where can they find it?
Several websites offer beautiful, customizable receipts that you can download for free. These printable templates are often available in PDF or editable formats, allowing you to add your child’s name, date, and the amount left under the pillow. Some sites offer colorful fairy designs, while others are simple and elegant.
Here are a few places to start your search:
- Pinterest – Search for “Tooth Fairy receipt free printable”
- Canva – Offers editable templates
- 123Certificates.com – Has themed certificates and receipts
- Template.net – Easy to edit and download
You don’t need special software—just a regular printer and some paper. With these tools, you can make the moment memorable, magical, and absolutely free. This small gesture creates big joy and turns an ordinary morning into something your child will remember for years.
What Details Should a Tooth Fairy Receipt Include?
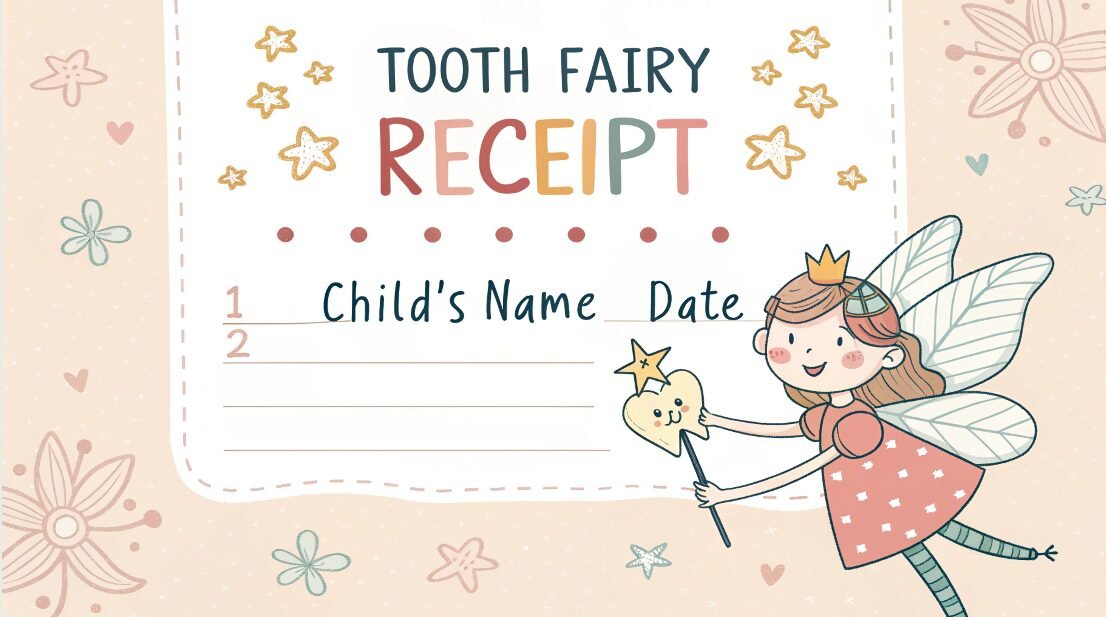
A good Tooth Fairy receipt isn’t just a piece of paper — it’s a certificate of magic. To make it believable and special, it should include some important details that make your child smile and feel appreciated. Here’s what a typical receipt should have:
- Child’s Name: So it feels personal and made just for them.
- Date of Tooth Collection: Helps mark the milestone in time.
- Tooth Type: For example, “1st baby molar” or “front incisor”.
- Reward Amount: $1, $5, a coin, or even a surprise gift.
- Tooth Fairy’s Signature: Add some glitter or a fairy stamp for magic.
- Special Message: “You did a great job taking care of your tooth!” or “Keep brushing daily!”
Optional but fun:
- Tooth Condition: “Excellent,” “Shiny,” “Needs more brushing” — for a bit of playful feedback.
- Fairy Dust Level: Just a fun, magical rating system!
- Tooth ID: A pretend number like “TF#1021” to make it official.
Adding these details turns a simple receipt into a childhood keepsake. Whether you use a premade printable or design your own, including thoughtful details will make the Tooth Fairy’s visit unforgettable.
How Do I Print a Tooth Fairy Receipt at Home?
Printing a Tooth Fairy receipt at home is simple. First, find a free template online (PDF, Word, or image format). Download it and open it using any device—laptop, tablet, or phone. Use a color printer for a magical look, or black and white if you prefer simplicity. Make sure you:
- Use good-quality paper
- Set your printer settings to “Best”
- Trim the edges neatly
For extra fun, sprinkle a little glitter or attach a sticker. You don’t need to be crafty or technical — just a printer and love for magical surprises will do the trick!
Which Websites Offer Free Printable Tooth Fairy Receipts?
Many trusted websites offer free printable Tooth Fairy receipts with unique designs and customization options. Here’s a list of some top sources:
1. Canva
- Offers editable templates
- You can add your child’s name, colors, and message
- Free version available
2. 123Certificates.com
- Simple and themed receipt templates
- Easy to print and fill in manually
- No sign-up required
3. Pinterest
- Search “Tooth Fairy receipt free printable”
- Find creative ideas from blogs and parent sites
- Direct download links to PDFs
4. Template.net
- Printable and editable files
- Includes multiple styles (fun, elegant, fantasy)
- Some may need a free account
5. Etsy (Freebies Section)
- Some sellers offer free downloadable samples
- Just filter by “Price: Free”
Tips When Downloading:
- Always check if the download is really free
- Use sites that don’t ask for credit card info
- Prefer sites with direct PDF links for quick access
These websites are a treasure trove of magical templates. Once printed, personalize the receipt and leave it under your child’s pillow with the reward. Your child will wake up surprised and delighted. It’s an easy and memorable way to build lasting childhood memories without spending a single penny.
Can I Customize a Printable Tooth Fairy Receipt?
Yes, you absolutely can! Many online templates allow you to customize every part of the receipt, making it feel truly personal and magical. Customization usually includes:
- Child’s full name
- Date of visit
- Type of tooth collected
- Amount rewarded
- A message from the Tooth Fairy
If you use websites like Canva or Microsoft Word, you can even change:
- Font styles (make it look magical!)
- Background color
- Add fairy clip art or stars
- Include your child’s favorite color or character
Don’t worry if you’re not tech-savvy. These platforms are user-friendly and often offer drag-and-drop features. Once you finish editing, simply download the file and print it. For extra magic, consider adding fairy dust (glitter), using gold ink, or placing the receipt in a mini envelope.
Customizing your receipt shows your child that the Tooth Fairy made a special effort just for them. This little touch can make the experience unforgettable, encouraging better dental care and belief in magical moments.
Why Use a Tooth Fairy Receipt Instead of Just Money?
While leaving money under the pillow is a time-honored tradition, adding a Tooth Fairy receipt brings more wonder and meaning to the experience. It’s not just about the reward—it’s about creating lasting memories.
Here’s why a receipt makes it more special:
- Adds Believability: A receipt with the fairy’s name and signature makes the story feel real.
- Creates Keepsakes: Parents can save the receipts as part of a memory book or baby album.
- Encourages Good Habits: A message on the receipt can praise brushing and flossing.
- Builds Excitement: Waking up to something official adds excitement beyond just finding coins.
Children love details. When they read their name, the date, and a fairy’s note, it sparks curiosity and imagination. Instead of just seeing money, they see proof that a magical visitor came just for them.
Also, receipts can be customized to add encouragement or even playful warnings—like brushing better next time. They work as tools for storytelling and learning.
In short, Tooth Fairy receipts make the tradition richer. You’re not just giving a reward—you’re giving joy, magic, and a memory that may last far longer than a dollar ever could.
What Paper Is Best for Printing Tooth Fairy Receipts?
Choosing the right paper makes a big difference in how magical your Tooth Fairy receipt looks. You don’t need expensive supplies—just smart choices:
- Matte cardstock: Sturdy and elegant
- Glossy photo paper: Bright and colorful
- Colored paper: Adds fairy-like charm
- Parchment paper: Looks antique and magical
Make sure your printer settings match the paper type for best results. Cut the edges neatly, or use decorative scissors for a fairy scroll effect. Adding sparkle or glitter after printing gives it that final touch of enchantment.
How to Add Magic to a Printable Tooth Fairy Receipt?
A simple paper can become something truly magical with just a few creative steps. After printing your Tooth Fairy receipt, here’s how to transform it into a fairy-tale experience:
1. Glitter Dust
Sprinkle a little glitter (aka “fairy dust”) on the receipt. Seal it in a small envelope with glitter inside for extra surprise.
2. Mini Envelope
Use a small, colorful envelope — smaller than usual mail. Kids love tiny things. Decorate it with stars, hearts, or wings.
3. Add a Fairy Stamp
Create or download a fun fairy seal/stamp image and print it at the corner of the receipt. It gives an official feel.
4. Fairy Footprints
Use a pencil eraser dipped in glitter paint to make tiny dots — “fairy footsteps” — on the envelope or around the pillow.
5. Scent It Softly
Spray a light vanilla or lavender scent on the receipt. Let it dry. The soft smell adds to the magical atmosphere.
6. Attach a Small Gift
Instead of just money, add a mini toy, sticker sheet, or tooth-themed eraser along with the receipt.
7. Fairy Handwriting
Use a curly or script-like font for printing, or write the message in a “fairy handwriting” style with a sparkly pen.
These little touches don’t take much time, but they create a rich, immersive moment for your child. The Tooth Fairy becomes real not just through the story—but through the details you create around it.
What if I Don’t Have a Printer? Can I Still Give a Tooth Fairy Receipt?
Yes! Even without a printer, you can still create a beautiful Tooth Fairy receipt using everyday materials at home.
Try These Ideas:
- Handwritten Receipt: Use a pen and paper to write your own. Add curly handwriting, draw tiny stars, and sign it with a “Fairy Queen” name.
- Use a Phone App: Apps like Canva or PicsArt allow you to design digital receipts. Then show it to your child on a phone or tablet as a “magical message.”
- Create a DIY Card: Fold colored paper into a small card. Write a message and paste some stickers or drawings.
- Send a Voice Note: Record a voice message pretending to be the Tooth Fairy, and play it for your child in the morning.
Even without printing, creativity brings the same magical results. Kids don’t expect perfection—they just love the idea that something mystical happened during the night. It’s the story, the sparkle, and your effort that truly matters.
How to Make a Bilingual Tooth Fairy Receipt?
In multilingual homes, a bilingual Tooth Fairy receipt is a wonderful way to teach and celebrate both languages. Whether your family speaks English and Spanish, Urdu and English, or any other combo—adding both languages makes the experience even more personal.
Steps to Create One:
- Choose a Template: Pick a blank or editable receipt from sites like Canva.
- Divide the Layout: Use columns or separate sections for each language.
- Keep it Simple: Use short phrases like:
- “Tooth Received” – “Diente Recibido”
- “Reward Amount” – “Cantidad del Premio”
- “Fairy Name” – “Nombre del Hada”
- Use Fun Fonts: Try curly or magical fonts for both languages.
- Add Graphics: Stars, fairy wings, and moons help bridge language gaps.
Benefits:
- Celebrates Culture: Reinforces both languages in a positive, joyful context.
- Improves Reading: Encourages kids to read and understand both sides.
- Creates Connection: Grandparents or family members can understand and join in the fun too!
Can I Customize a Free Printable Tooth Fairy Receipt?
Absolutely! Customizing your free printable Tooth Fairy receipt is the best way to make it special for your child. Many templates are editable and easy to personalize, even if you’re not a design expert.
Ways You Can Customize:
- Add Your Child’s Name
Most PDF or Word templates allow you to type in your child’s name so it feels more personal. - Change the Date & Time
Include the exact night the tooth was collected—kids love details. - Include a Custom Note
Add a short message from the Tooth Fairy like: “You’re brushing so well! Keep it up!” - Pick a Fairy Name
Create a unique fairy persona like “Twinkle Belle” or “Captain Sparklewing” for repeat visits. - Adjust the Reward
Not all fairies leave the same amount—write what fits your family best. - Decorative Fonts & Colors
Use soft purples, sparkles, or glittery-looking text if you’re editing the file digitally. - Add Tooth Icons or Wings
You can easily insert images or stickers digitally or after printing.
Tools to Use:
- Canva – Drag-and-drop editor, very beginner-friendly.
- Google Docs – Simple text editing with shareable links.
- PDF Editors – Like PDFescape or Adobe Acrobat Reader (free versions available).
By customizing the receipt, you’re turning a generic template into a magical memory. It’s not just a form—it’s a fairy-crafted document, tailor-made for your little one.
Top 5 Free Printable Tooth Fairy Receipt Templates Online
Want to skip designing and just download something magical? Here are five free printable Tooth Fairy receipt templates available online:
1. Canva (canva.com)
Easy-to-edit designs with cute icons. Ideal for adding names and notes.
2. Etsy (Free section)
Many Etsy sellers offer freebies or samples. Just search “Tooth Fairy receipt free download.”
3. 123Homeschool4Me.com
Has adorable, child-friendly designs available in PDF formats.
4. TheSuburbanMom.com
Free templates with checkboxes, tooth illustrations, and reward notes.
5. Pinterest Boards
A goldmine of printable receipts. Use search terms like “free Tooth Fairy printable.”
All these sites offer creative, whimsical designs that are easy to print or edit. Choose one that matches your child’s style—fairy wings, magical stars, or royal scrolls!
How to Store Tooth Fairy Receipts as Keepsakes?
Tooth Fairy receipts aren’t just one-night fun—they’re keepsakes your child will treasure for years. Just like report cards or baby shoes, they can become part of a family memory box.
Storage Ideas:
- Memory Box
Keep all receipts, baby teeth (optional!), and small notes in a labeled box. - Scrapbook
Stick each receipt on a page along with the date, a photo of the child, and a few words about the lost tooth. - Plastic Sheet Protectors
Slide each receipt into a clear plastic sleeve and store them in a small binder. - Digital Archive
Scan or take photos of each receipt and create a digital album. - Tooth Fairy Journal
Dedicate a small notebook to the Tooth Fairy tradition. Paste receipts and write a short note after each visit.
Storing these keepsakes helps preserve your child’s magical years. As they grow older, they’ll enjoy flipping through the pages and remembering the excitement of finding that first shiny coin under the pillow.
Fun Ideas to Pair with a Tooth Fairy Receipt
Add a bit more sparkle to the tradition by pairing your Tooth Fairy receipt with:
- ✨ A glitter trail leading from the pillow
- 🪥 A new toothbrush or mini toothpaste gift
- 📜 A tiny fairy scroll note
- 🎁 A mini toy or sticker pack
- 💡 A glow-in-the-dark star on the ceiling
These extra touches don’t have to cost much—but they turn a small moment into something unforgettable. It’s the little surprises that keep the fairy magic alive.
Should Boys Get Different Tooth Fairy Receipts Than Girls?
No! Magic knows no gender, and Tooth Fairy receipts can be enjoyed by all kids—boys, girls, and nonbinary children alike. What matters is matching the design to your child’s interests.
Think in Terms of Themes:
- Space fairy for space-loving kids
- Pirate fairy for adventurers
- Royal fairy with crowns and scrolls
- Animal fairy with friendly critters and paw prints
Instead of pink and glittery, go for bold colors or quirky fonts if your child prefers it. The Tooth Fairy can take any form—it’s all about imagination. The receipt should reflect your child’s personality, not outdated ideas of gender.
How to Make a DIY Tooth Fairy Receipt Without a Printer
No printer? No problem! You can create a magical DIY Tooth Fairy receipt with basic supplies at home. Handcrafted receipts often feel even more personal and special.
What You’ll Need:
- Blank paper (parchment, colored, or plain)
- Colored pens or markers
- Glitter glue or stickers
- Ruler (to create neat lines)
- Optional: gold/silver ribbon or seal sticker
Steps to Make It:
- Cut the paper into a small rectangle, like a real receipt.
- Draw borders or a fairy seal at the top.
- Write the child’s name, date, and tooth details.
- Add a magical message like “Keep brushing!” or “This tooth is sparkly clean!”
- Decorate the corners with stars, wings, or your child’s favorite characters.
- Roll it up like a scroll or fold it neatly under the pillow.
If you’re artistic, sketch a mini fairy signature or add a drawing of a sparkling coin. The point is to make the moment magical—even without technology!
Are There Tooth Fairy Receipts in Other Languages?
Yes! Tooth Fairy receipts are available in many languages including Spanish, French, German, and more. You can find bilingual templates online or create one using translation tools.
Websites like Canva, Google Docs, or Pinterest often offer:
- Spanish: “Recibo del Hada de los Dientes”
- French: “Reçu de la Petite Souris” (in France, a little mouse collects teeth!)
- German: “Zahnfee-Quittung”
This makes the tradition more inclusive for bilingual families or those celebrating in their native language. Just search “Tooth Fairy receipt + [language]” and explore beautiful international versions!
When Should the First Tooth Fairy Receipt Be Given?
The first Tooth Fairy receipt should ideally be given the first time your child loses a tooth. This is a huge milestone in childhood and often comes with mixed emotions—excitement, confusion, maybe even fear.
That’s where the receipt comes in. It helps:
- Mark the occasion with a tangible memory.
- Ease anxiety by turning a lost tooth into a magical reward.
- Start a fun tradition your child will look forward to.
Even if you missed the first tooth, you can start anytime. The Tooth Fairy can include a note like:
“Sorry I’m late! I was flying over a rainbow storm, but I finally made it!”
If your child is around 5 to 7 years old, they’re in the typical age window to begin losing teeth. But every child is different—some start earlier or later. Be prepared with printable templates in advance so you’re not scrambling at bedtime.
Once the first receipt is a hit, your child will be excited to collect more. You can even start numbering them—“Receipt #1, #2, etc.”—to make a fairy series. This simple gesture will give your child something to look forward to, tooth after tooth.
Tips to Keep the Tooth Fairy Magic Alive
As your child grows, it might become harder to keep the Tooth Fairy magic alive. But a few clever tricks can stretch the wonder a bit longer.
Helpful Tips:
- Use different handwriting or fonts for each receipt.
- Sprinkle glitter (“fairy dust”) near the pillow or windowsill.
- Change the fairy name once in a while—kids love variety.
- Leave tiny footprints using a damp toothbrush and flour.
- Add a “Tooth Inspection Report” with notes like “no cavities found!”
Keep an eye on your child’s questions. If they ask, “Is the Tooth Fairy real?”—answer with curiosity, not denial. Say something like, “What do you think?” This invites imagination while keeping the belief intact.
Also, consider asking your child to write back to the Tooth Fairy. You can leave a mini-reply the next night—this builds a fairy relationship they’ll treasure.
What If You Forget to Leave the Receipt?
It happens! Parents are human, and sometimes the Tooth Fairy forgets to show up. If you forgot the receipt (or the money), don’t panic. The magic can be saved.
Quick Fixes:
- Blame Fairy Traffic: “There was heavy fairy traffic last night. She’s coming tonight!”
- Emergency Message: Leave a note the next day apologizing for the delay.
- Double Reward: Leave two coins or a special item the next night to make up for it.
- Tooth Still There: Say the fairy doesn’t collect dirty teeth—ask your child to brush it first and try again.
Kids are usually very forgiving—and a well-written receipt with a tiny apology will only add to the charm. Turn it into part of the fairy tale!
Can a Tooth Fairy Receipt Be Reused for Multiple Kids?
Yes, with a bit of customization, a Tooth Fairy receipt can definitely be reused for siblings or multiple children. The key is to personalize each one so every child feels the receipt is uniquely theirs.
How to Customize:
- Change the child’s name and date.
- Update the tooth number or tooth type (incisor, molar, etc.).
- Modify the message for each child—something playful or age-appropriate.
- Use different colors or borders to make them look fresh.
If you’re using editable PDF templates or Canva designs, this process is super easy. Just tweak a few words, download, and print again. You can even save different versions for each child in your computer under names like “Emma_FirstTooth.pdf” or “Liam_Receipt_3.pdf”.
Reusable receipts are great for big families because they save time and ensure everyone gets a similar magical experience without you starting from scratch each time.
Where Can I Store Tooth Fairy Receipts?
Once your child starts collecting receipts, you’ll need a safe and special place to store them. These tiny notes from the Tooth Fairy become part of their childhood keepsakes.
Storage Ideas:
- Tooth Fairy Memory Box – Decorate a small box or buy a themed one online. Add the child’s name and store each receipt chronologically.
- Mini Scrapbook – Paste each receipt in a small album with photos, dates, or drawings of your child’s smile.
- Binder With Plastic Sleeves – Great for printable receipts. You can add pockets for teeth charts or fairy stories too.
- Digital Folder – If you design receipts digitally, create a “Tooth Fairy” folder on your device and store PDFs or scanned versions.
A designated place keeps everything organized and helps build anticipation. Every time your child loses a tooth, they can revisit old receipts and track how they’ve grown.
Bonus tip: Include a Tooth Timeline Chart in the folder to track when and which tooth was lost. This becomes a beautiful part of their dental journey.
Over time, the collection becomes a cherished memory book—especially when they realize how much love you put into each fairy visit.
What to Avoid When Creating a Tooth Fairy Receipt?
Even a magical moment can be spoiled by small missteps. Here’s what to avoid when making a Tooth Fairy receipt:
Common Mistakes:
- Forgetting the child’s name – This ruins the personal touch.
- Using hard-to-read fonts – Kids love reading the receipt themselves.
- Too much text – Keep the message short and sweet.
- Inconsistent fairy stories – Don’t say one thing one time and another the next.
- Generic templates with no edits – Always personalize at least the name and date.
Also, avoid including anything negative. Even if the tooth had a cavity, the receipt should focus on encouragement, like: “Keep brushing and flossing for shinier teeth!”
Keeping it magical and age-appropriate is key. It’s better to be simple and heartfelt than overly fancy or confusing.
Fun Variations of the Classic Tooth Fairy Receipt
While the classic receipt is cute, you can jazz it up with fun variations to surprise your child.
Creative Ideas:
- Golden Coin Receipt – Write on shiny gold paper and mention a “Golden Tooth” reward.
- Glowing Receipt – Use glow-in-the-dark ink or stickers so it shines at night.
- Tiny Fairy Envelope – Shrink the receipt and put it in a miniature envelope for extra magic.
- Puzzle Receipt – Split the receipt into 2–3 pieces. Your child has to put it together in the morning.
- Reward Chart Style – Turn each receipt into a progress chart with fairy stars for good brushing habits.
You can also theme receipts around seasons or events:
- Winter Fairy – Add snowflakes and mention “I flew through a snowstorm!”
- Birthday Tooth – “Happy Birthday! A tooth on your big day? Extra special!”
- Lost Tooth While Traveling – “Thanks for leaving the tooth in the hotel pillow!”
These small changes add excitement and create long-lasting memories. Plus, it keeps the tradition alive and fresh every single time.
Final Thoughts: Why Every Parent Should Use Tooth Fairy Receipts
A Tooth Fairy receipt is more than paper—it’s a magical way to celebrate childhood milestones. It teaches kids about care, reward, and imagination. Whether printed or handmade, it adds a personal touch to a beloved tradition.
By using different styles, creative messages, or even glittery flair, parents can make each tooth loss a moment of celebration. These little notes can turn into treasured keepsakes for years to come.
So whether you’re downloading a free printable or crafting your own—every smile, every receipt, and every memory will sparkle just a little brighter.


Leave a Reply